Affinity Designer Vector Cut Out Tool
Vector Shape Building – Part one – The Basics
Shape building is a highly effective and speedy way to create a range of custom shapes for anything from simple icons to full blown digital illustrations. It's essentially the process of using multiple vector shapes to Add, Subtract or work in conjunction with one another to produce new, non-standard shapes.
In this blog post we will be showing you the 5 different tools found in Affinity Designer, which can also be applied to Adobe Illustrator – the tool names are different but the outcome is pretty much the same.
These functions are Add, Subtract, Intersect, Divide and Combineand they can be found in the top toolbar in Affinity in form of these five buttons. –

In Illustrator, the equivalent tools can be found in the "Pathfinder" toolbar, which can be found in the 'Window' dropdown menu. I will also show the corresponding Adobe Illustrator buttons through the course of the post.
Add
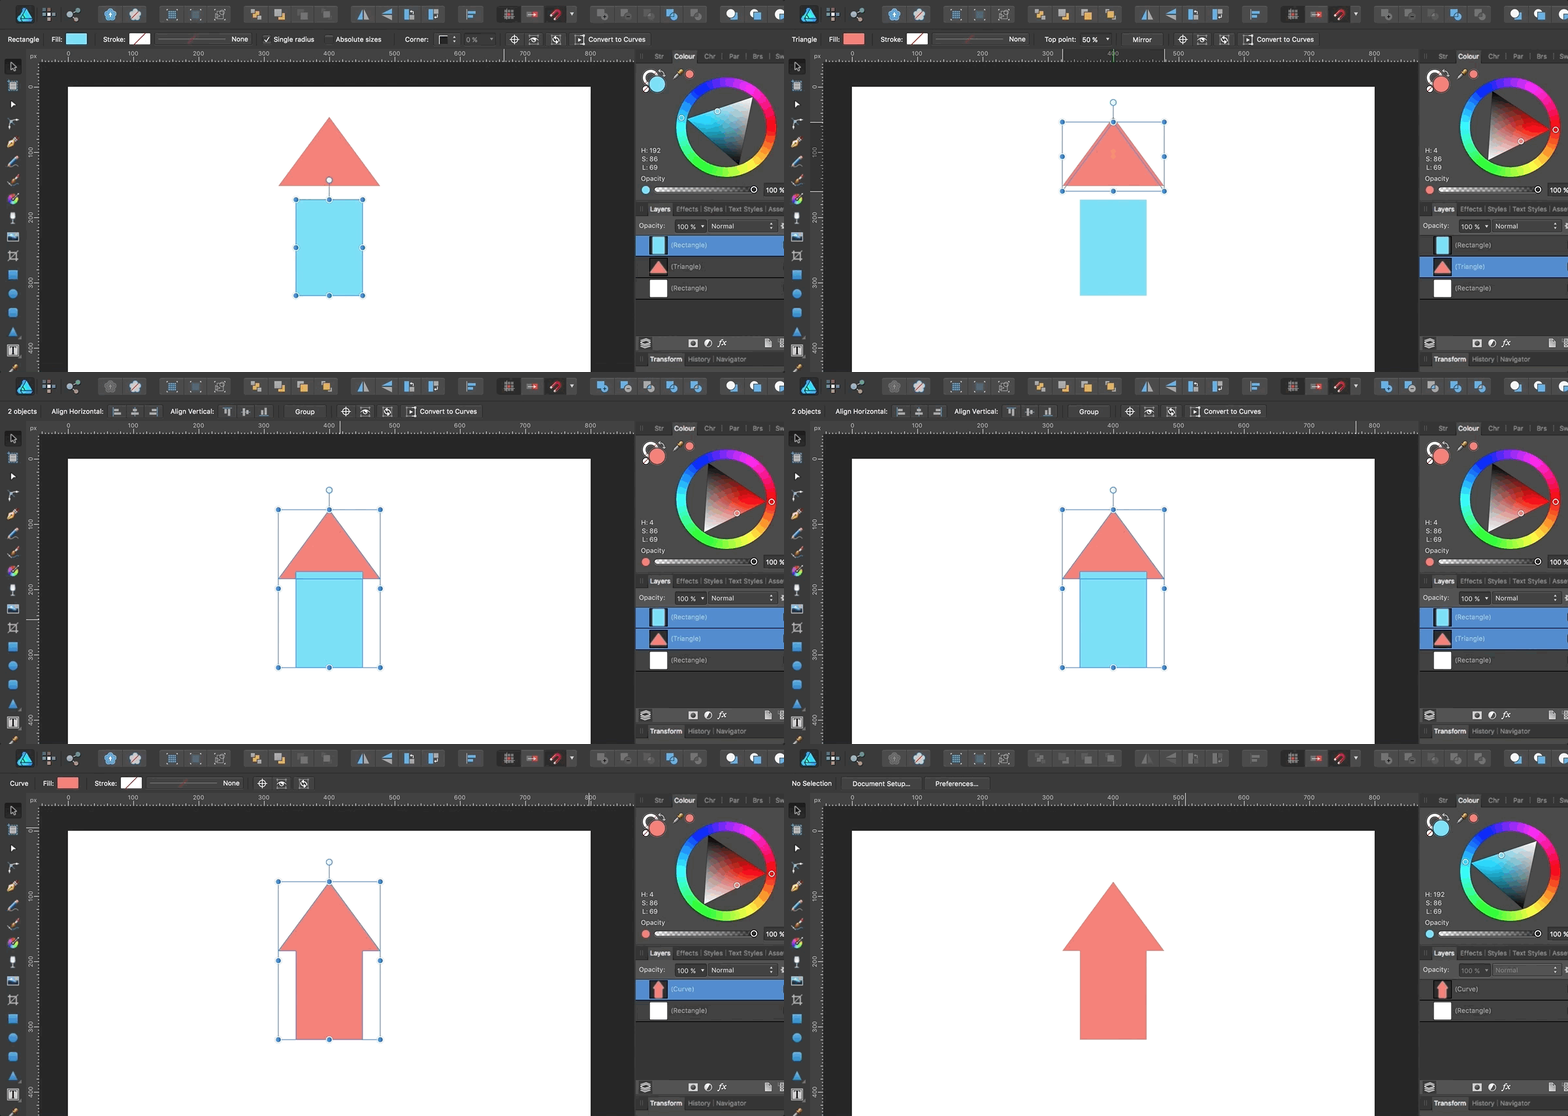
First of all I wanted to show the simplest and most commonly used function, the 'Add' tool as it is known in Affinity Designer (the 'Unite' tool in Adobe Illustrator).
 Simply position the shapes you wish to combine, which can be intersecting or separate and click the Add button (image to the right). This will combine everything selected into one single vector shape, which takes it's colour from the shape that was on the bottom.
 The 'Unite' tool in illustrator works the same, and can be found in the 'Pathfinder' toolbar in the form of the button to the left. The combined shape however takes it's colour from the shape that was on top.
See the full process below –
Subtract
Next up we have the equally commonly usedSubtract tool, which is known as Minus Front or Minus Back in Illustrator. The tool works slightly differently in the two programs but the premise is the same.
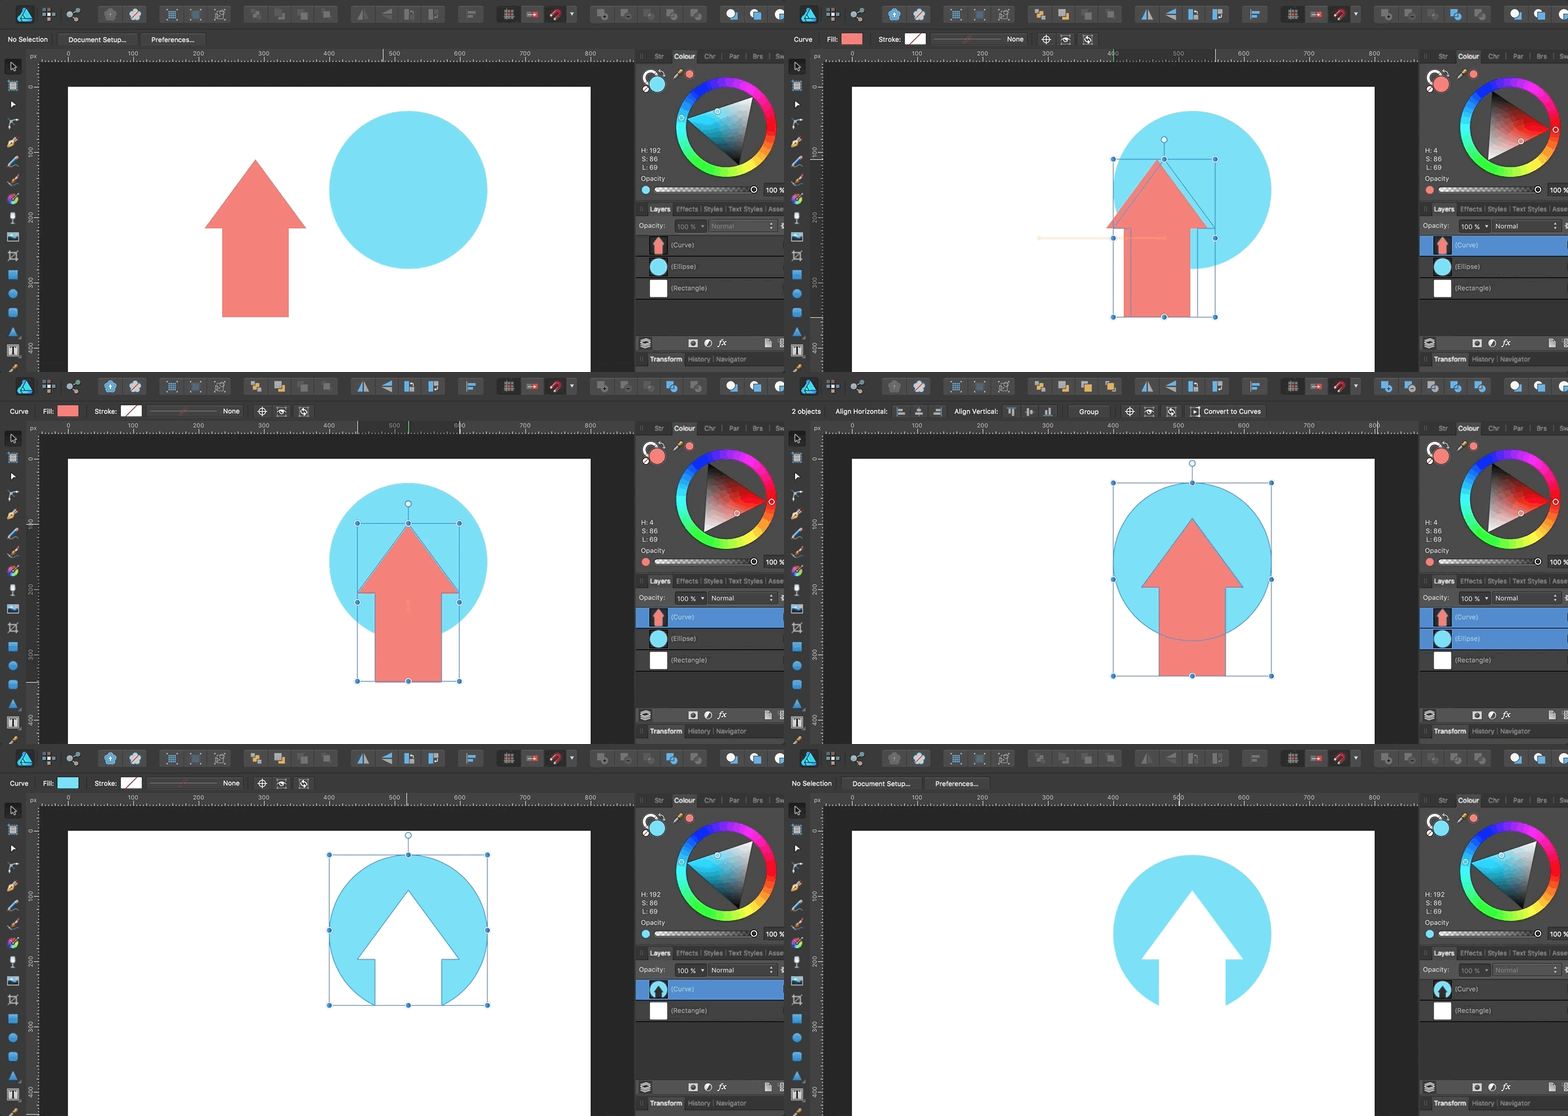
 In Affinity, position the shape you wish to subtract on top of the shape you wish it to be subtracted from. When you click the subtract button (to the right) this will essentially cut the top shape out of the bottom one. You'll notice that the shape you're cutting out with vanishes, so I tend to make a copy and hide the layer in the layers panel, in case I wish to use this shape later.
 In Illustrator however, there's two different tools for this, one which takes the top shape away from the bottom and vice versa. As the names 'Minus Front' and 'Minus Back' suggest. The shape being subtracted from keeps it's original colour. See the image to the left, the top button is Minus Front and the bottom is Minus Back.
See the full process below –
Intersect
Next up we have one of my favourite functions, the 'Intersect' tool.
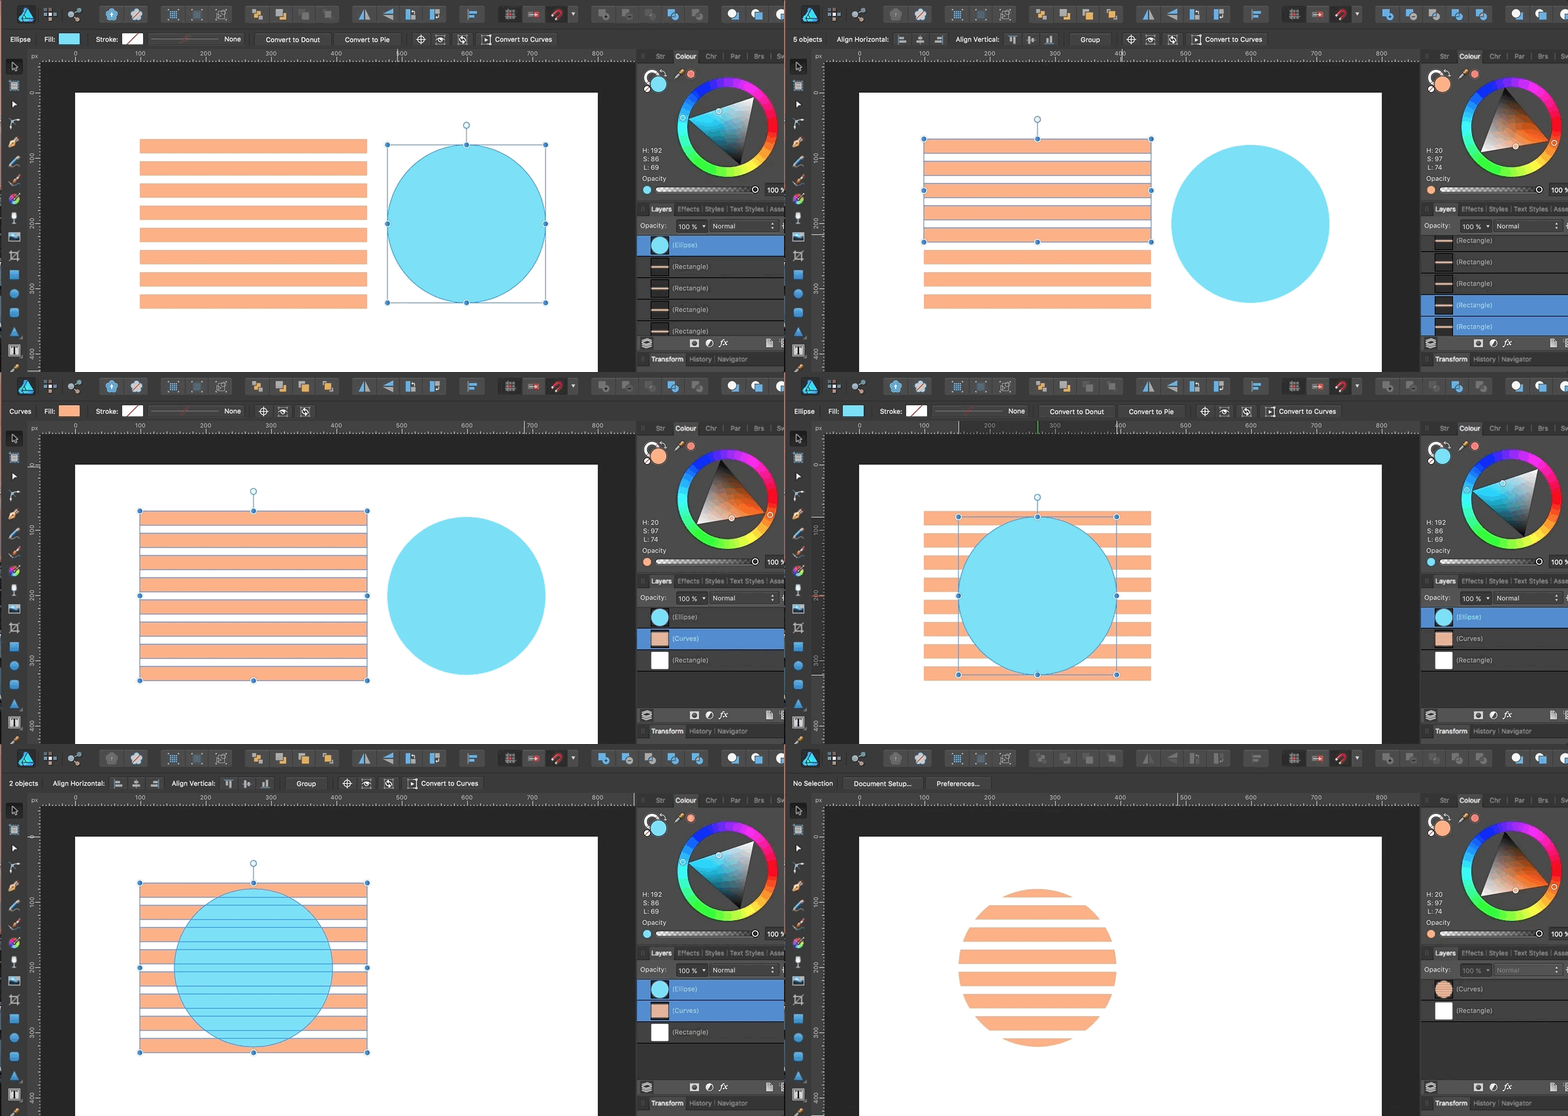
 This tool means you can use one shape as a kind of "cookie cutter" to cut out a new one. It works in the same way as a clipping mask in most other programs, as you are using it cut away anything that isn't inside the top shape. Leaving only the parts that are"intersecting".
 The illustrator version has the same name and works in exactly the same way, the buttons appearance is the only thing that differs. See the image to the left. In Illustrator you may find it easier to create a clipping mask, using the top shape to cutout the bottom as with intersect tool. The clipping mask in Affinity Designer doesn't work with vector shapes, so this function is a lot more crucial.
This tool has many different uses, one of my favourites is masking patterns into other shapes (as seen in the below GIF). In Affinity designer you must first ensure the pattern is combined into one shape using the 'Add' tool we mentioned earlier.
See the full process below –
Divide
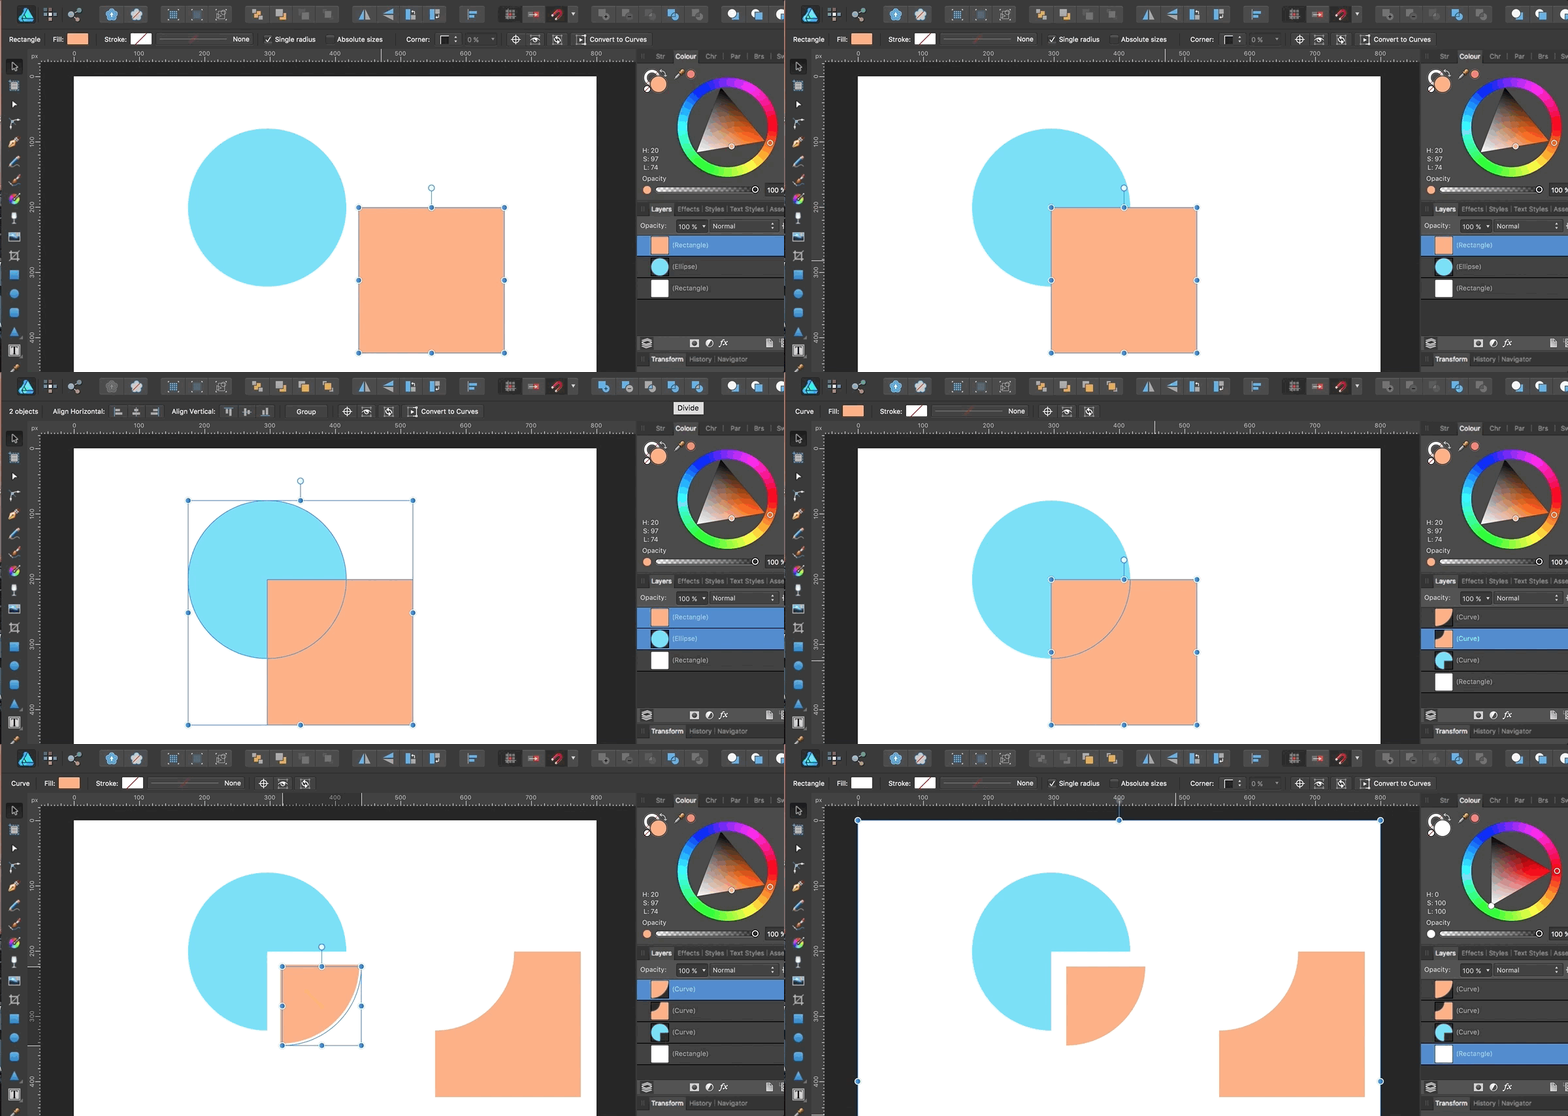
The 'Divide' tool works in a similar way to the intersect tool, but instead of removing the parts of the shape that are not intersecting, it simply separates them into new shapes. As seen in the GIF below.
 In Affinity, position your two shapes with one of top of the other and click the Divide button (see image to right). You will then be able to separately select the shape new shapes and recolour or move them as you wish. This is quite a nice technique for creating icons and logos, you can experiment with contrasting colours and even use this technique to create an offset 3D look or to give the illusion that your shape or type is being taken apart.
 In Illustrator the equivalent tool has the same name and function as with the intersect tool, just with a different button (See the image to the left).
See the full process below –
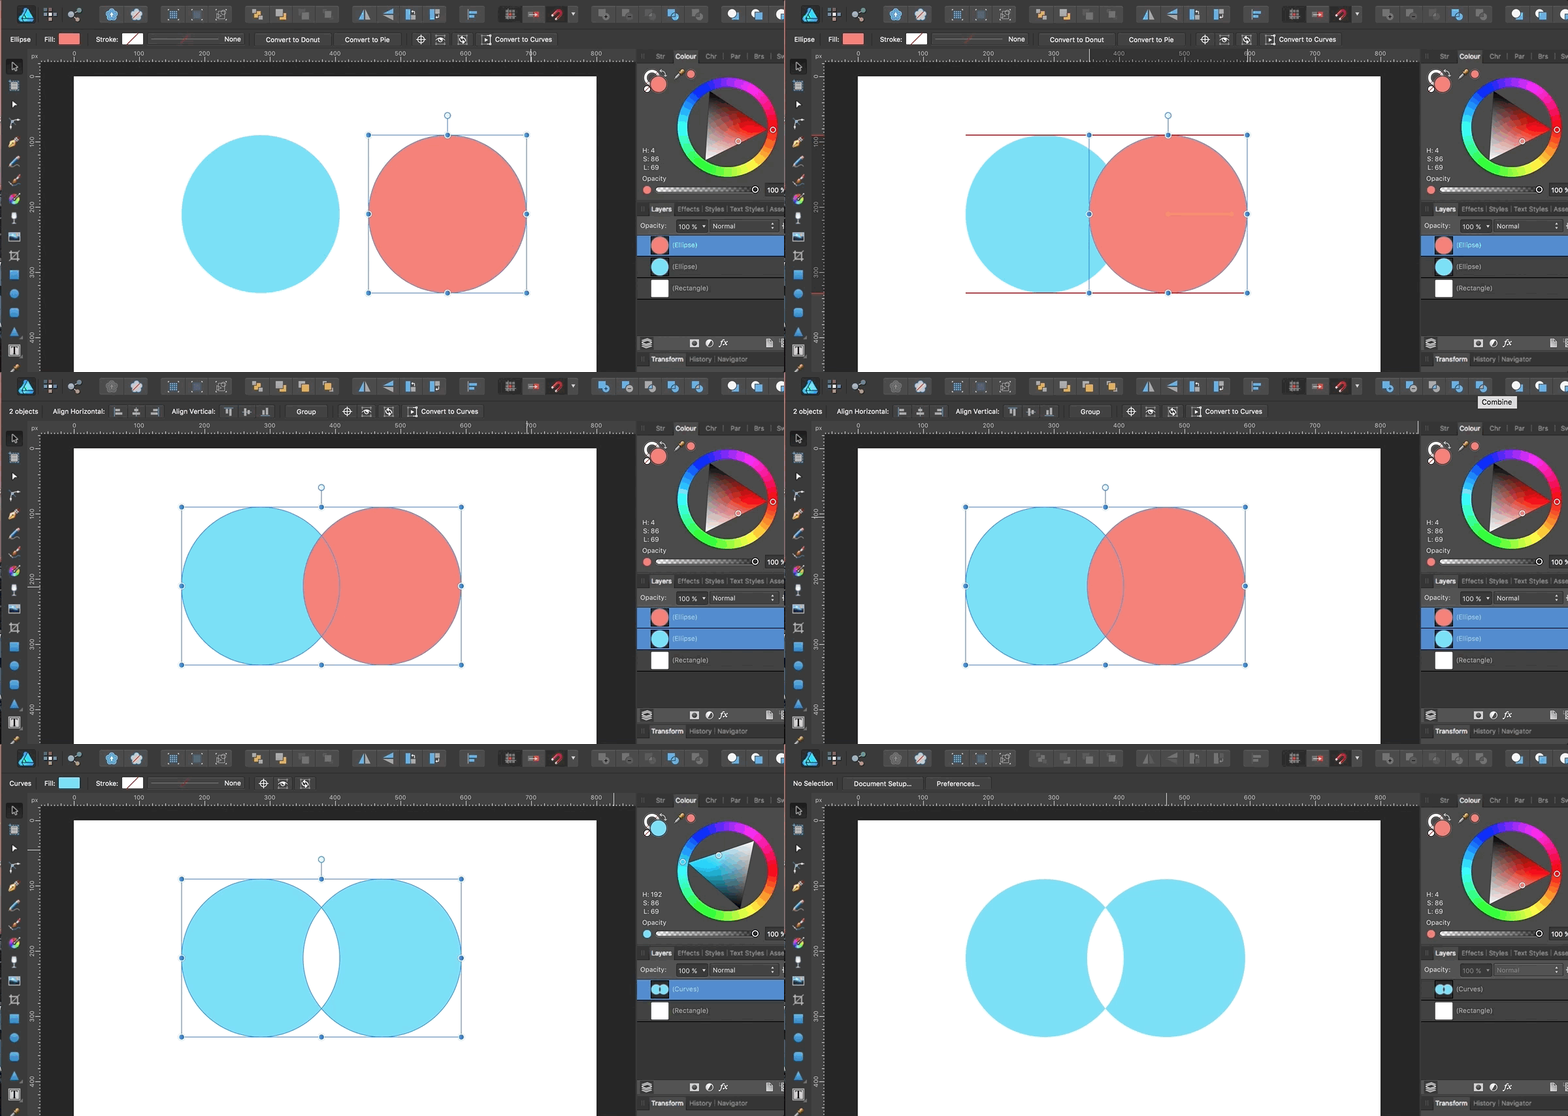
 Combine
The final tool we will be talking about is the 'Combine' tool. This is definitely the tool I use the least, as I prefer to use 'Divide' and then re-colour or remove the shape manually. But this tool essentially removes anything in the area where two shapes intersect,the opposite of the outcome of using the 'intersect' tool we mentioned earlier.
As with the other tools, position your shapes and click the 'Combine' button (see the image above right). This will leave you one single shape, made up of the non-intersecting areas. This new shape will take on the colour of the previous shape that was on the bottom.
 The Illustrator equivalent is called 'Exclude', which is much more self explanatory – it excludes the area where the shapes meet, leaving the areas where they don't.
See the full process below –
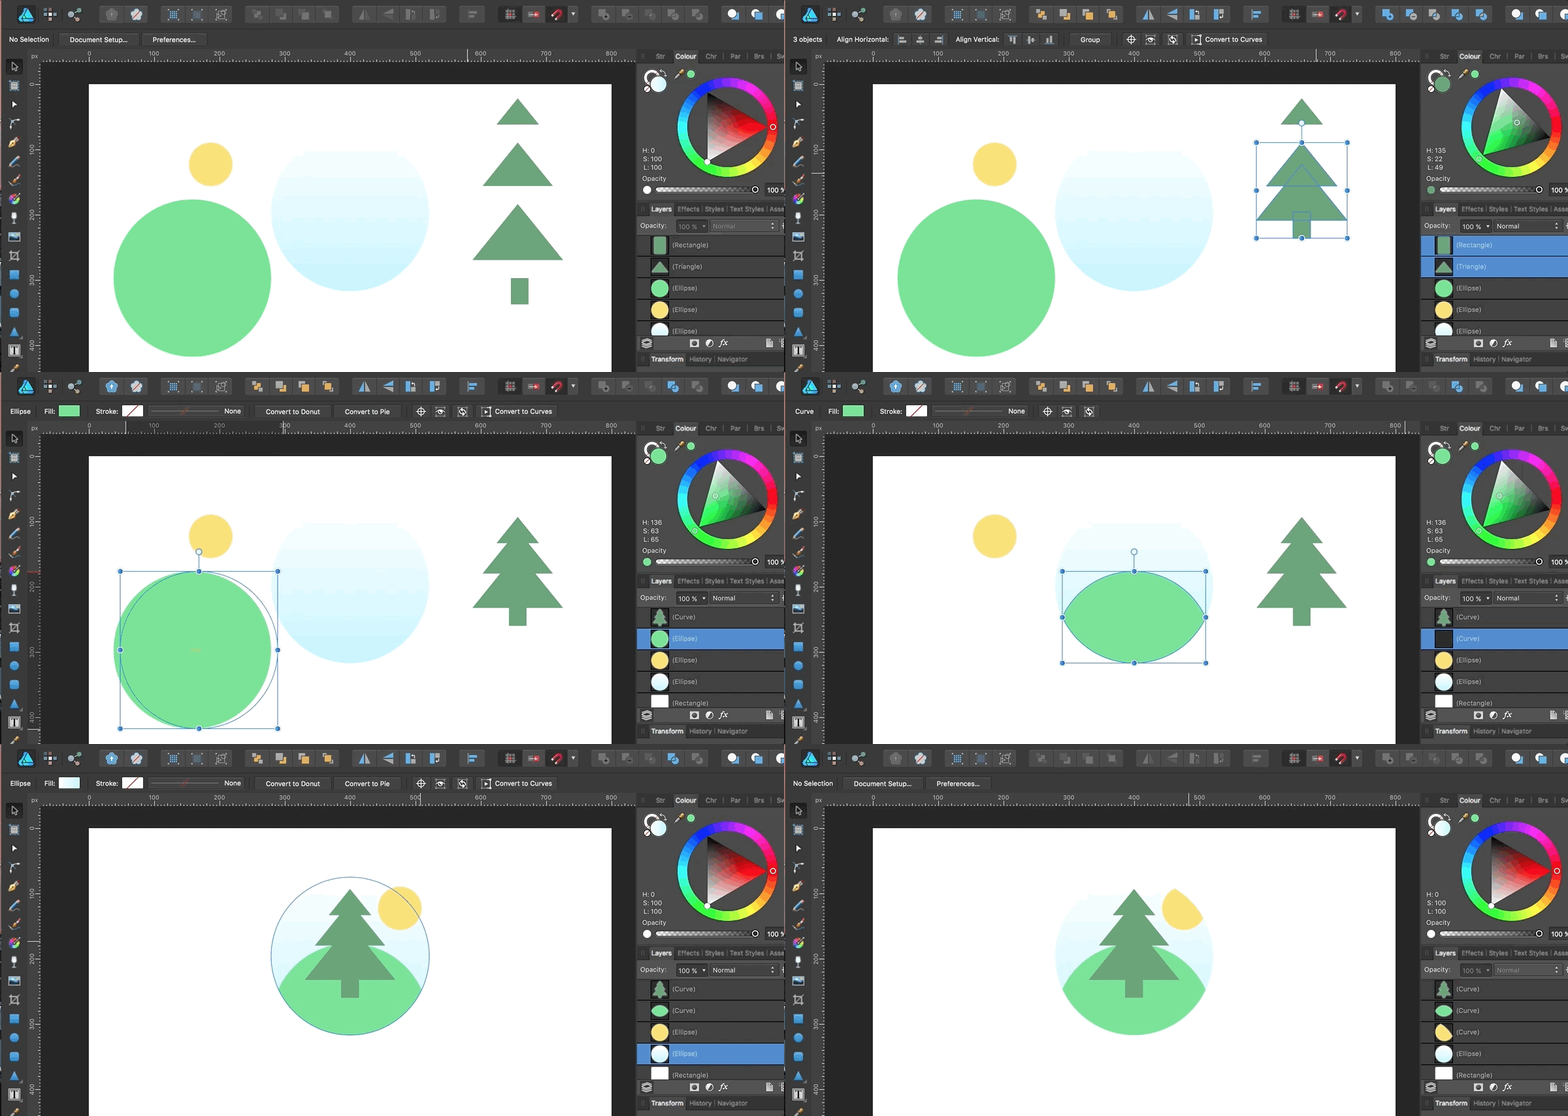
Combining the functions
To finish up here is a GIF that demonstrates how you can combine the different tools to create anything from quick icons, to very complex illustrations. In this case I used the Add and Intersect functions to create a very simple circular illustration in less than 30 seconds.
Other Pathfinder tools in Illustrator
In Illustrator there's also a few more tools in the Pathfinder toolbar that we haven't mentioned, these include –
Trim – This tool has the same function as 'Divide'but instead of dividing at the intersecting points it trims the top shape from the bottom, leaving you with two new shapes.
Merge –This tool works exactly the same as 'Unite' or 'Add' if the shapes you're combining are the same colour. If not, it works the same as the 'trim' tool.. A bit of a pointless tool really.
Crop – This tool works is extremely similar to 'Intersect', cropping out the the area where the top shape intersects the bottom one.
Outline –This tool converts all of the shapes into line and breaks them at all of the points that the lines meet. Essentially 'intersect' for outlines.
There we have it, the absolute basics of shape building, the best way to learn more about the process is to try and experiment with all of the tools and find which ones work best for you. We will however be covering some more advanced techniques in future blog posts.
Affinity Designer Vector Cut Out Tool
Source: https://www.assisted.co.uk/vector-shape-building-part-one-basics/
Posted by: oharacompay.blogspot.com

0 Response to "Affinity Designer Vector Cut Out Tool"
Post a Comment